


Live Blog is a next-generation open-source blogging software created by Sourcefabric. Live Blog enables media organisations and bloggers to cover breaking events as well as events that unfold during a longer period of time. Live Blog makes it easy to embed video, images, text and audio from reporters and social media channels into your posts. You can use Live Blog with your own CMS by embedding the Live Blog code into your site’s page.
Sourcefabric offers a hosted version of Live Blog. Our hosted version of Live Blog is a web-based application. You can read about hosted pricing for Live Blog here.
Live Blog enables multiple users to collaborate within the same application to produce blog content from anywhere with internet access. Work can be divided between contributors, editors and administrators. Live Blog has an intuitive interface and can be used with our free Live Blog mobile app that makes blogging on-the-go easy.
With journalists from the BBC, the Guardian, Le Monde, Vorarlberger Nachrichten and Zeit Online all having contributed to its design, Live Blog can justly be said to have been designed by journalists for journalists. Live Blog was originally developed for GEN, the Global Editors Network, and further developed in partnership with Mozambique’s @Verdade newspaper.
Yes! There is a Live Blog app!
This means you can update your Live Blog from your mobile device. You can download the Live Blog app for free from the Apple App Store or from the Google Play Store. The app can be used in conjunction with a hosted Solo-Mobile plan or higher.
You can find the app in by typing “Live Blog Reporter” in the store’s Search Bar.
Find more information about how to use the Live Blog Reporter app: here: https://sourcefabricberlin.zendesk.com/hc/en-us/articles/115001402363-Live-Blog-Reporter-App
Visit liveblog.pro/en/try-liveblog-free/ or send us an e-mail demo@liveblog.pro.
Sourcefabric offers a range of hosted packages to meet your needs: liveblog.pro/en/pricing/.
For more details feel free to contact demo@liveblog.pro
Your readers can access your blog from your Live Blog website. The address of your site will be https://(something).liveblog.pro. When we set up your Live Blog, you will choose a name for your instance. The (something) is the name of your instance.
It is not possible to change the name of your instance from within the Live Blog interface. If you need to change your Live Blog blog name, contact us: help@sourcefabric.org
Currently all of the X updates have to be manually added to your Live Blog.
Live Blog comes with various themes preinstalled – one of them being the Liveblog AMP theme, which renders the content compatible to the “Accelaretad Mobile Pages” project. Publishers that want to deliver their content not only in the regular browser, but also specifically optimised for mobile devices often choose to render their content also according to the requirements of AMP.
Live Blog supports this approach with the possibility to publish the same content in different ways. For this purpose administrators and editors can create additional Output Channels. Output Channels are used for branding purposes and to inject advertisements into the liveblog timeline on the one hand and to publish the same content based on different themes on the other hand. Now, as soon as your organisation has set up Live Blog in a way that it´s output can be embedded into the article pages not as iframes (which would not match the AMP criteria), but based on Edge Side Include technology – you are ready to go.
AMP compatible Output Channels can be created specifically for each individual blog or based on a general setting in the Liveblog 3 Default SEO theme.
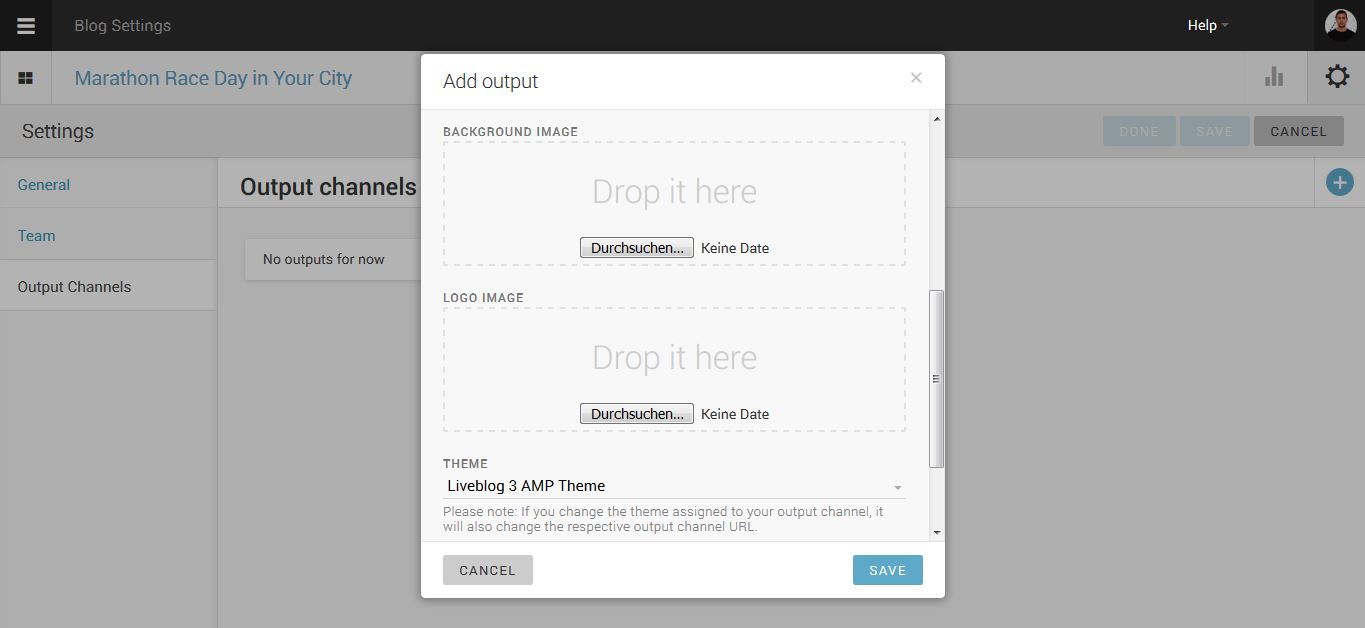
Add an AMP compatible Output Channel to an individual blog
- Create a blog
- Open the blog settings by clicking on the gear icon in the top right corner of the interface
- Click on the menupoint “Output Channel” and create a new Output Channel by clicking on the blue plus sign
- Give it a name (for example AMP) and scroll down to select the Liveblog3 AMP theme
- After saving your changes an Output Channel based on the AMP theme will be created
- Supply the Output Channel URL inside your CMS to load the AMP compatible output
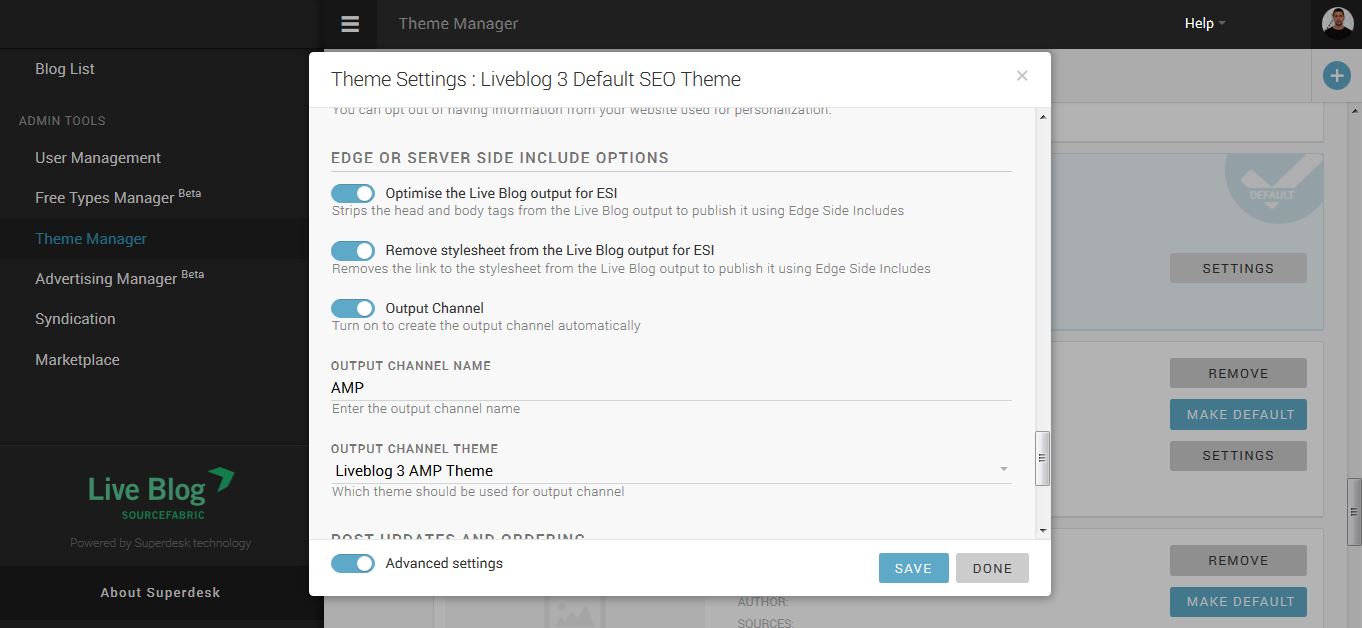
Automatically add an AMP compatible Output Channel to every new blog
If your organisation does not only want to deliver certain content or blogs in an AMP compatible way, but decides to always support this type of output, you can also automatize the creation of AMP Output Channels based on the Liveblog 3 Default SEO theme. Here is what you have to do:
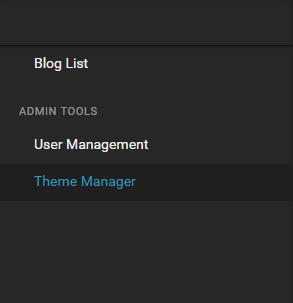
- Go to the Theme Manager
- Open the theme settings for the Liveblog 3 Default theme and make sure to switch on the “Advanced settings” and scroll down to the “Edge Side Include Options”.
- If you are working with AMP compatible output all switches should be activated and you can now add an Output Channel name and select an Output Channel Theme (in this case the AMP theme)
- After your settings are saved, each time when you create a new blog now based on the Liveblog 3 Default theme, an Output Channel with the given name and based on the AMP theme will be created automatically.
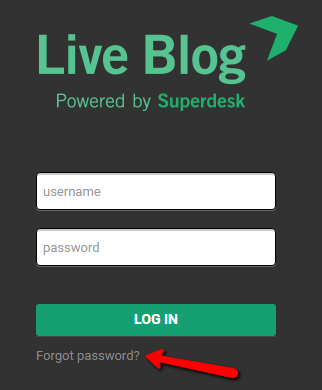
If you have forgotten your password such that you can’t log in to Live Blog, click on the Forgot password link below the login text boxes on your Live Blog website.
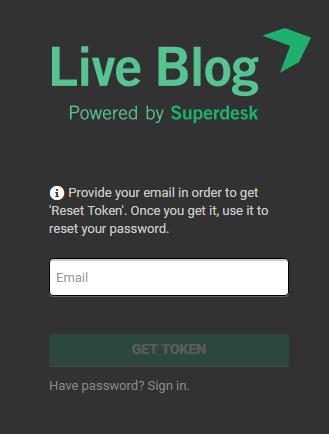
Live Blog will then prompt you to submit your email address in order to get a code to reset your password. Note that the email you submit must be the same as the one listed on your Live Blog user profile. Click the GET TOKEN button. Shortly after you click the GET TOKEN button, you will receive an email with your token which will allow you to reset your password. Follow the emailed instructions to reset your Live Blog passwords.
You can also change your password from within the Live Blog interface.

Access your profile by clicking on your user icon in the top right corner of the Live Blog interface and then selecting the PROFILE link below your username.
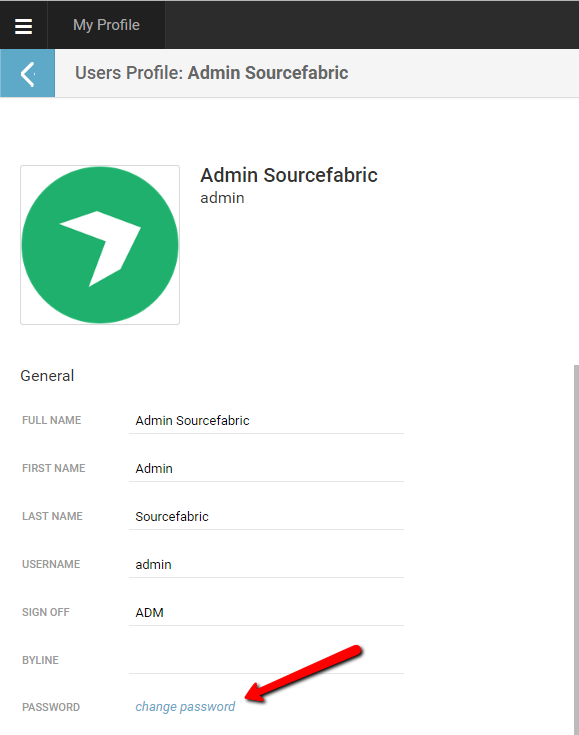 Click on the change password link halfway down the page in the profile pane.
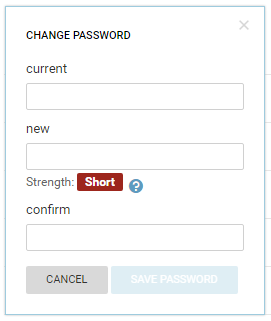
Clicking on the change profile link will pop up a new window where you must input your current password and then your new password twice. Note that your new password must be at least 8 characters long and contain 3 out of the following:
- Lower case letter (a-z)
- Upper case letter (A-Z)
- A number (0-9)
- A special character (!@#$%^&*…)
Once you click the SAVE PASSWORD button, you will need to use your new password to log in on your next session.
When you log in to your Live Blog instance, you will be taken to the current Blog List.
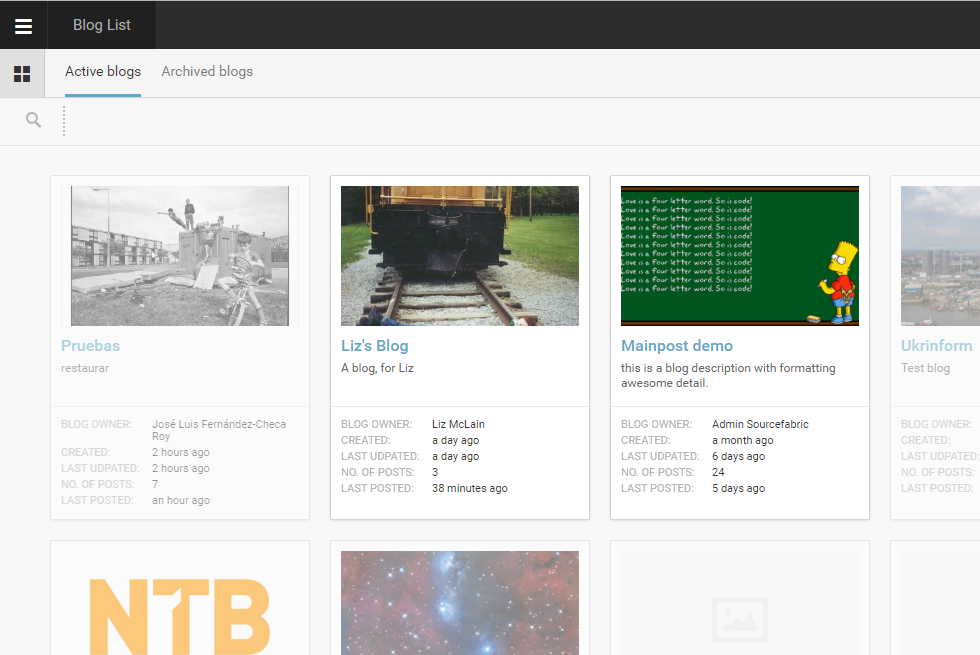 The Blog List view shows all the blogs in your Live Blog instance. Blogs that are greyed out are blogs that you do not currently have access to. Blog that you can access are in full colour.
![]() This is the Settings menu.
This is the Settings menu.
 In the top left corner of the Live Blog interface, you will find the settings menu. Clicking on the Settings menu will open a new pane on the left.
In the Admin Tools section of the settings menu, users with appropriate permissions can add new users or disable current users as well as manage the display themes. To exit the settings menu, click on the Blog List link at the top.
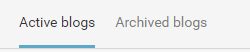 In the main Blog List view, you can switch between seeing active blogs and archived blogs by using the tabs at the top of the Blog List window. Archived blogs are blogs that are no longer active. Archived blogs can not be updated unless the status is changed back to active.
![]() Just below the Active blogs tab, you will find a search bar. Use this search bar to find specific blog by typing in blog titles or part of the blog description.
Just below the Active blogs tab, you will find a search bar. Use this search bar to find specific blog by typing in blog titles or part of the blog description.
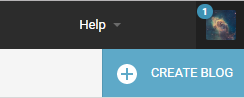 In the top right corner of the Live Blog interface, you will find your user icon, as well as the Create Icon.
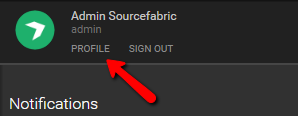
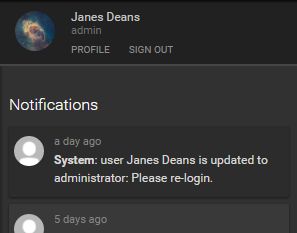 Clicking on your user icon will open a new pane on on the right with system notifications. Directly below your username, you will find links to edit your profile and as well as the link to sign out of Live Blog. Click on your user icon in the top right corner again to close this pane.
![]()
Just below your user icon, you will find the Create icon. Clicking on the Create icon in the Blog List window allows you to make a new blog.
![]()
Below the create icon, you will find options to adjust your Blog List view. You can customise how your blogs are displayed by adjusting the number of blogs per page, using the drop-down Page Size menu. Skip forwards or backwards through the Blog using the skip arrows. Lastly, you can switch between a list view and a grid view using the icons depicted below. The grid view allows for room to view the Blog Image.
![]() Switch to a list view by clicking on this icon.
Switch to a list view by clicking on this icon.
![]() Switch to a grid view by clicking on this icon.
Switch to a grid view by clicking on this icon.
Once you’ve clicked on a blog, you will be taken the the Editor / Timeline view of your selected blog. This is where you can add new content to your blog, as well as view all the previous blog entries.
![]() This is the Blog List icon.
This is the Blog List icon.
When you’re in the Editor mode, you can return to the Blog List view, by clicking on the Blog List icon.
Twitter (X) is a popular social media website. You can embed Twitter content from yourself or other people directly on your blog. The X post that you embed optionally can contain videos or pictures in the embed code. The Twitter website makes it easy for you to access the embed code for use in Live Blog. Just follow the steps below.
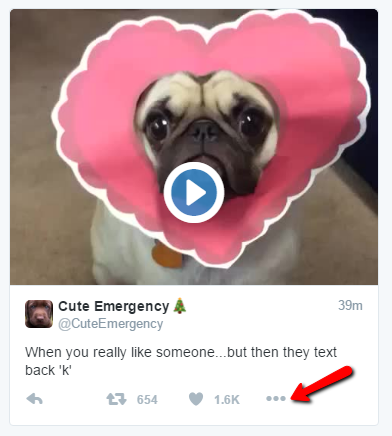
Step 1: Browse the Twitter website for the content that you wish to embed. Click on the tweet.
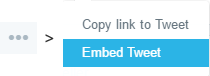
Step 2: Once you’ve found the post that you would like to embed, click on the action menu (beside the like button). The action menu will expand to give your two options. Select the Embed Tweet option.

Step 3: Once you’ve selected the Embed Tweet option, a new window will open with the embed code highlighted in a text box. Copy (ctrl + c) the embed code from the textbox. If the Include media checkbox selected, the copied embed code will contain the images or videos associated with the Tweet. If the box is unchecked, the copied embed code will contain only text.
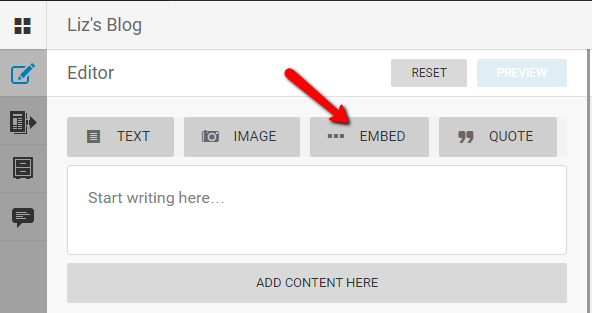
Step 4: In the Live Blog Editor interface, select the Default post type. Click the ADD CONTENT HERE button, then click on the EMBED button.
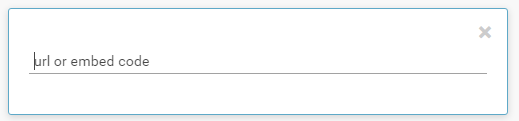 Step 5: Once you’ve clicked on the EMBED button in the Live Blog editor, you will see a textbox into which you can paste (ctrl + v) the embed code that you have copied from the Twitter website.
Step 6: As soon as you have pasted the code into the textbox, the full tweet appear in the Live Blog editor. Remember that you can have multiple types of media in a single post. You can add comments or photos above or below the Twitter embed to the post before you choose to publish it. Click the PUBLISH button to post to your Timeline.
When you log into Live Blog, click on the user icon in the top right corner of the Live Blog interface.
Click on the profile link. This will take you to your profile page.
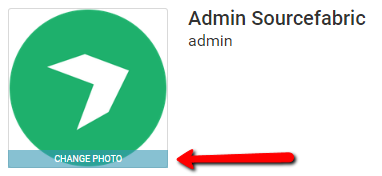
When you hover over the user icon, you will see an option to change the photo. Click on the CHANGE PHOTO button.
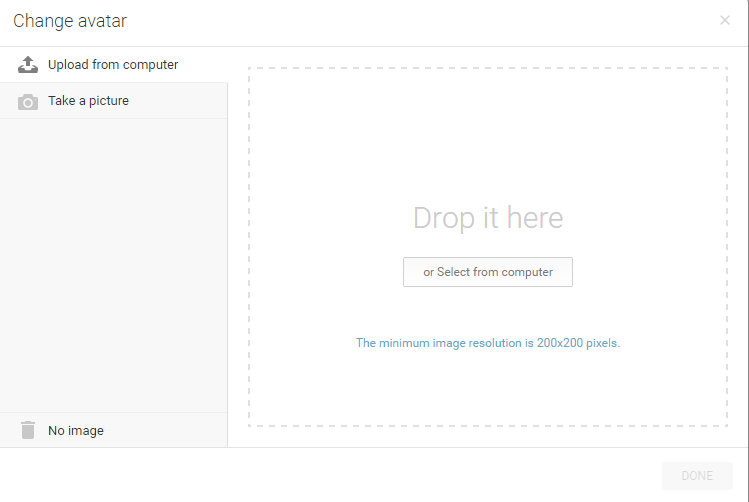
In the Change Avatar window, drag and drop a file from your computer or click on the Select from computer button to open a folder to browse from. The image should be at least 200×200 pixels. You can delete your current icon by clicking on the No image link in the bottom left corner of the window. Once deleted, you will not be able to recover the icon unless you have it saved locally on your computer.
Your Live Blog user icon is also your author avatar if the show author avatar checkbox is selected in the Theme settings.
In most cases editors embed their blog output into an article of the news publication or blog they are writing for. In order to do so, open the blog for editing and click on the Blog Settings menu (gear icon) in the top right corner of the Blog Editor mode.
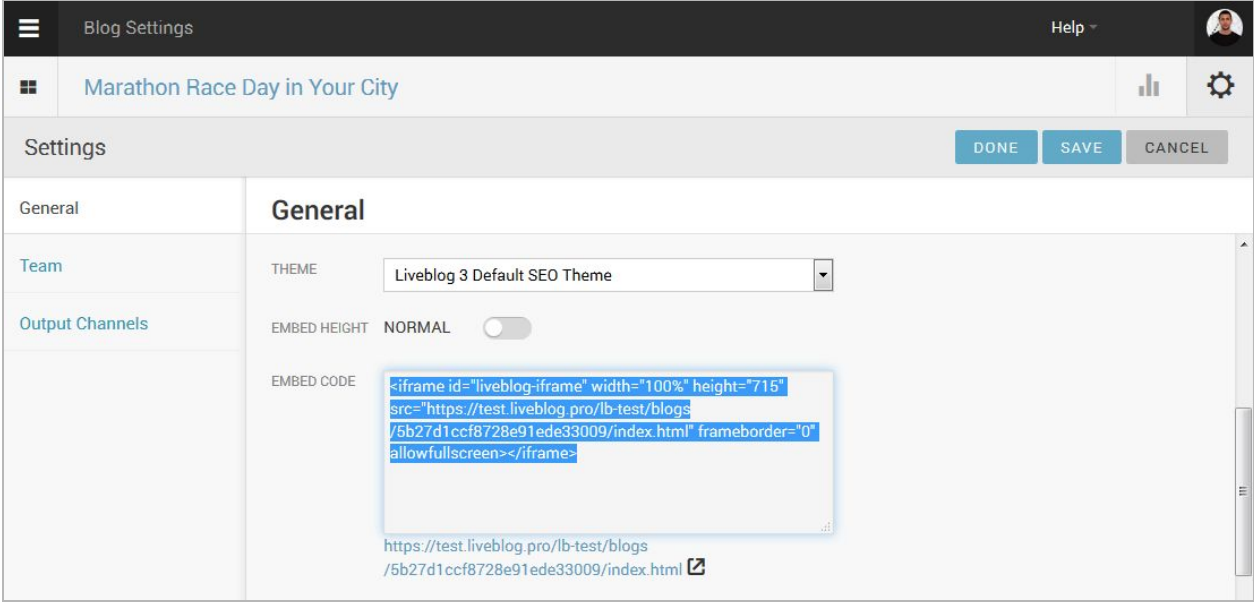
In the Settings menu you will find the Embed Code for either a regular ‘iframe’ with a fixed height, or – if you toggle the ‘Embed Height’ – you can also copy a ‘Responsive’ embed with a fluid height. Choose what works best for your website and now simply copy and paste the embed code into the article where you want to have the blog embedded.