by Todd Jatras | Mar 26, 2020
How To Upload Videos to YouTube Directly from Live Blog
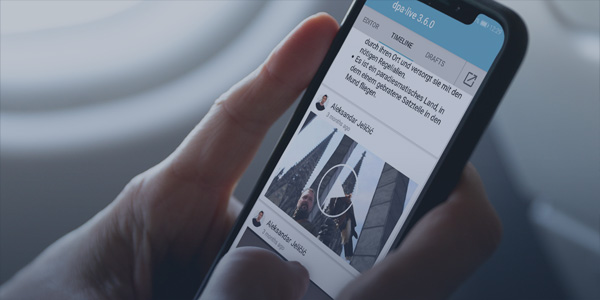
There are many reasons why you should be using videos in your live blogs, chief among them is providing readers with a fuller, visual perspective on the story at hand. Adding videos to your timeline also has an immediate impact on SEO efforts, as search engines tend to give a higher ranking to pages containing rich media, which in turn drives higher organic traffic and reader engagement. Our live blogging software gives you the option to do exactly that.
With that in mind, our recent release of Live Blog 3.6 included the ability to link your blog to a YouTube account and set it up to simultaneously upload videos there as you post them to your timeline.
Read on for a step-by-step guide to linking your Live Blog and YouTube accounts in five easy steps.
Step 1:
First, to set this up successfully, you will need to have administrative access for your Live Blog instance. You also need to have an active Google/YouTube account. Since Google own Youtube, you must have a Google account to set up Youtube. If you don’t already have an account, go to google.com and register for one, then sign in and go to https://console.developers.google.com/.
Step 2:
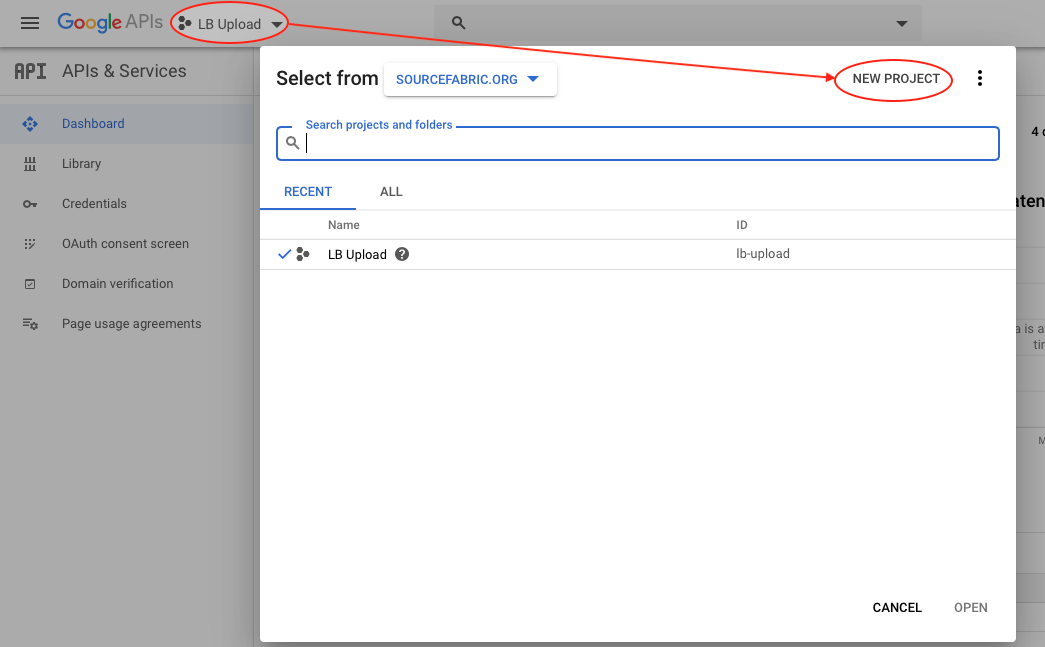
On the top left-hand side of this page (see below), pull down the “Select Project” menu and click “NEW PROJECT”. In the “Project name” field, give your project an easy-to-remember name like “LB YouTube”, then click the “CREATE” button.
Step 3:
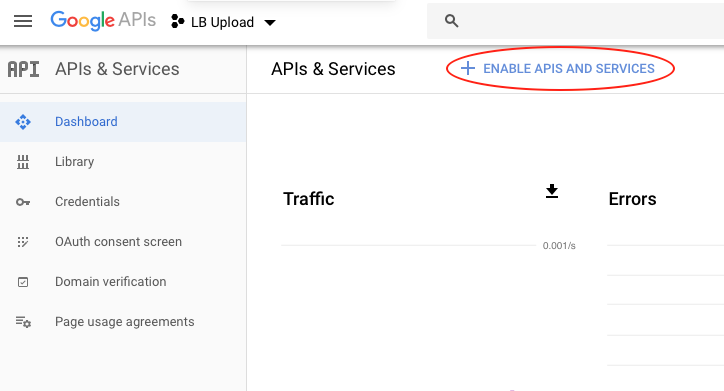
On the Google console page, click “+ENABLE APIS AND SERVICES” (below), which takes you to the API Library page. Scroll down the page and select “YouTube API v3”, then click the “ENABLE” button.
Step 4:
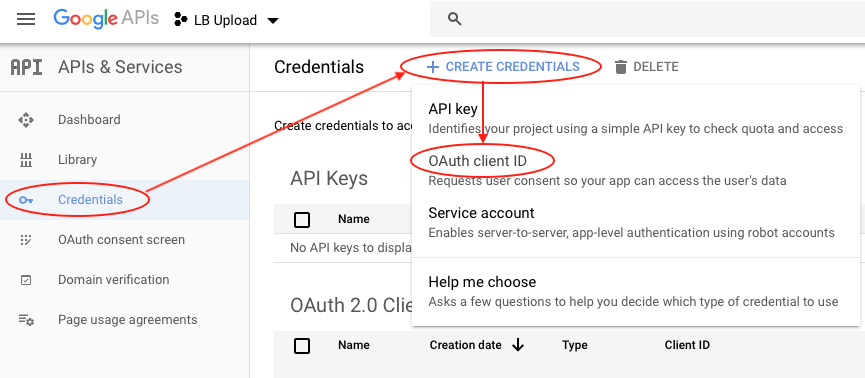
Now go to Credentials under APIs & Services (see below), click the “+CREATE CREDENTIALS” menu at the top of the page and select “OAuth client ID”. For application type, select “web application”. In the “Authorized redirect URLs” field, enter the redirect URL for your Live Blog instance (example: https://demo.liveblog.pro/api/video_upload/oauth2callback) and click the “CREATE” button. Do not include a backslash on the end of the URL or you will receive an error message.
Step 5:
Now that you have YouTube credentials (Client ID and secret code), download the file containing them by clicking the “DOWNLOAD JSON” button on the top of the page or the arrow down icon. Finally, go to Live Blog (see below), choose any blog you’ve created there (see below) and click “ADD CONTENT HERE”, select “Video”, then click “UPDATE CREDENTIALS” and follow the directions to upload the JSON file you downloaded.
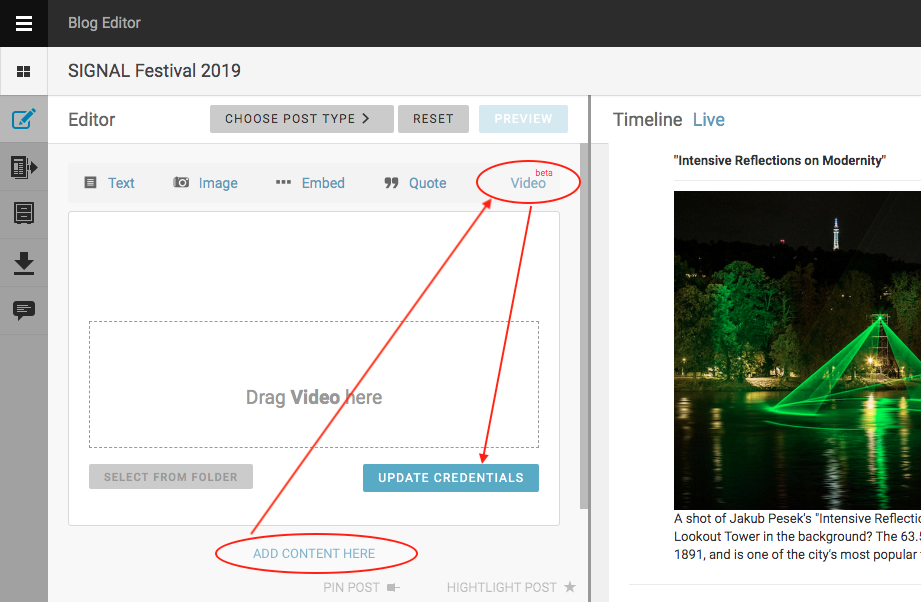
And there you have it. Now, when you post a video to your timeline by dropping it into the “Drag Video here” zone (above), it will be automatically uploaded to your YouTube account.
If you are not yet a Live Blog user and you’re looking for live blogging software to cover real-time news, you can try Live Blog for free here, no strings attached.